Icecast Server/Streaming to Icecast with Nicecast: Difference between revisions
RogueAmoeba (talk | contribs) No edit summary |
RogueAmoeba (talk | contribs) m Added a note that Nicecast has been retired |
||
| Line 1: | Line 1: | ||
{{IcecastThirdParty}} | {{IcecastThirdParty}} | ||
'''Note:''' Nicecast is no longer in development. To replace Nicecast, Rogue Amoeba has incorporated broadcasting into their Audio Hijack product. [[ | '''Note:''' Nicecast is no longer in development. To replace Nicecast, Rogue Amoeba has incorporated broadcasting into their Audio Hijack product. [[Icecast_Server/Streaming_to_Icecast_with_Audio_Hjack]] provides more details. | ||
---- | ---- | ||
Revision as of 00:24, 8 July 2018
Note: Nicecast is no longer in development. To replace Nicecast, Rogue Amoeba has incorporated broadcasting into their Audio Hijack product. Icecast_Server/Streaming_to_Icecast_with_Audio_Hjack provides more details.
What is Nicecast?
Nicecast is a commercial Icecast Source Client for Mac OS X developed by Rogue Amoeba Software, LLC. One of it's special features is that it works with a lot of VST/Audio Unit plugins. It can be obtained from the official Website, which provides a limited Demo version (which inserts noise on all broadcasts longer than 60 minutes) or the option to buy it.
The first start and some notes
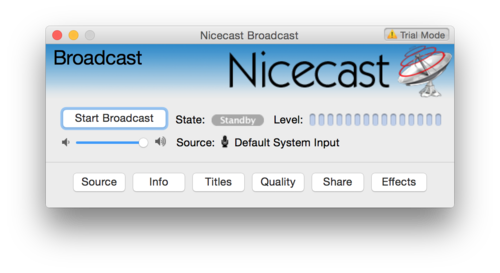
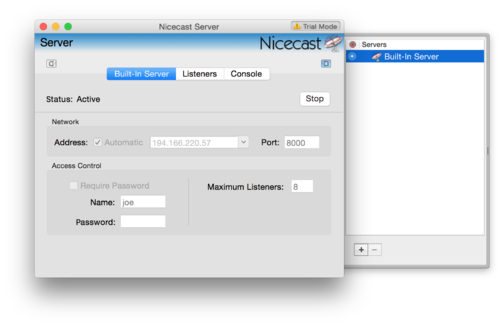
Nicecast is special, as it has a built-in Icecast Server, allowing for one-click Streaming. As we do not provide any support regarding this feature, this guide only covers how to Stream to a stand-alone Icecast Server. If you are running a standalone Icecast Server on the same machine you start Nicecast, it can happen that Nicecast will kill the stand-alone Icecast Server and you will need to restart it!
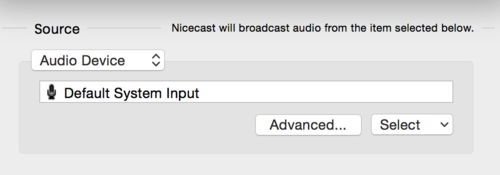
Set the Audio Source
First you need to set the Audio Source, this is, where the audio comes from that should be streamed to Icecast. Click on Source to select it:
Set the Stream Information
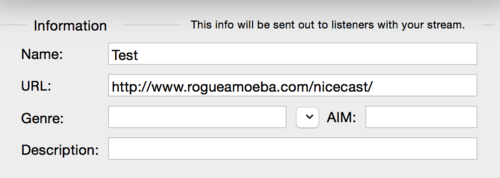
Now we need to enter Stream Information, to do so click on Info to switch to the Stream Info Settings Panel.
Here is a brief description for what each field is:
- Name: The name of your Stream, usually a short title of the program you are broadcasting. Note that this should not contain Metadata like currently playing Artist/Title.
- URL: An URL where more information about the stream broadcasted can be found. This is not the URL of your Icecast Server or Stream URL!
- Genre: The Genre of your Stream.
- AIM: This field is actually not used by Icecast so you can just leave it empty.
- Description: A short description of your stream/program.
Configuring the Icecast Server details
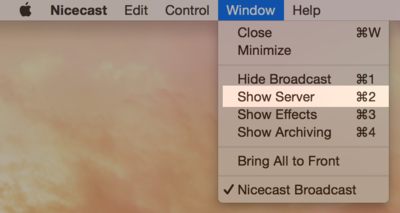
To configure the Icecast server details, click on Window > Show Server:
It should show up a Window with Servers like the following:
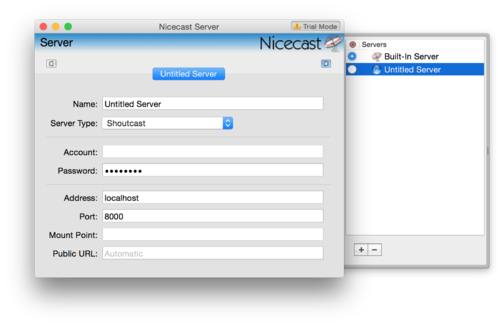
To create a new Server connection settings entry, click on the + Button, which should create a new List entry and select it:
Let's go through the fields together:
- Name
- Can be nearly anything, this is just so that you remember what Icecast Server these Settings are for. (Useful if you have more than one Server)
- Server Type
- Select Icecast 2 here, as you are probably using Icecast 2.
- Account
- This is the Username you are using to login with a Source Client to Icecast, if you have not configured a specific mount username, this is usually
source. - Password
- The password for the mountpoint, or if none configured, the global source client password.
- Address
- The hostname where your server is running. (Not a URL, so this should not start with
http://) - Port
- The port where the server is listening, usually this is 8000, if not changed in the Icecast config.
- Mount Point
- This is the Mountpoint to which Nicecast will stream. This should start with a slash, i.e.
/coolstream.mp3. (Do not set this to just/! - Public URL
- This is the Public URL your Icecast Server is accessible. Usually it will guess the right thing, based on the hostname, so you should be able to leave it blank.
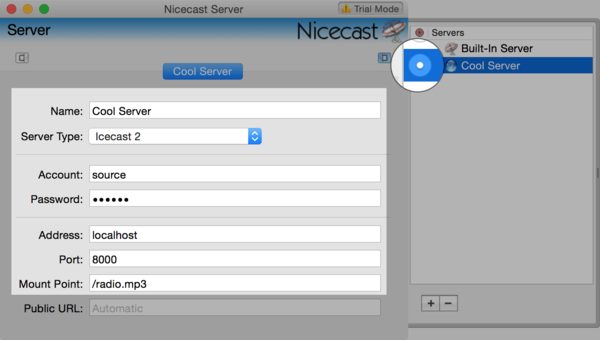
Now make sure you click the Radiobox next to the Icecast Server name in the list, so it's selected. (This is the Server that Nicecast will use for broadcasting)
Make sure that your Window looks similar to the following:
Close the Window and restart (there is a bug in the current Version that requires a restart to apply the settings) Nicecast.
To start broadcasting, click the "Start Broadcast" button. Broadcasting should start and you should be able to see the Stream appear on the Icecast Status Page.
